
Asp.net is Fully Based on Controls.Before Making any application ,I will learn First about the Asp.Net Controls.If you will understand the Use of Controls then you can easily make any Application without any problem in Asp.Net.There are some Types of controls which are used in Asp.Net.
- Web Forms Standard controls.
- Navigation Controls
- Validation Controls
- Web Parts controls
- Html Controls
we will understand one by one each Controls with Real Application.Now I am going to Know What is Web Forms Controls In Asp.Net?.
Note:- Whenever you will use Web Forms Controls in your Application then First write one Namespace Which is Given below:
using System.Web.UI.WebControls;
Because All Web Forms Controls comes Under this Namespace .
Web Forms Controls:-
There are some Web Forms Controls which is given below with Real Time Example:-
Properties of Label Control:-
There are some important properties of Label controls.
- Label Control
- TextBox control
- Button control
- Literal control
- PlaceHolder control
- HiddenField control
- FileUpload control
- Image control
- ImageButton control
- ImageMap control
1.) Label Control:-
The Label Control is basically used to display the Information(Text) on Web Forms.Any end User can not Edit(change) the Label Information.Properties of Label Control:-
There are some important properties of Label controls.
- Text:-It is used to change the Label control information(text).
- Font:- It is used to sets the font of the Label text.
- ForeColor:- It is used to sets the text color in the Label.
- Height:- It is used to Specify the height of the Label Control.
- BackColor :-It is used to Sets the Background color of the Label control.
- BorderWidth:-It is used to Sets the Border color of the Label control.
- BorderStyle:-It is used to Sets the Style of the Label control.
- AccessKey:-It is used to Navigate the Web Server control.
There are some steps to implement the Label control on the Web Form which is given below:
Step :1 First Open Your Visual Studio-->File-->New-->Web Site-->Select ASP.NET Empty Web Site-->OK-->Open Solution Explorer-->Right Click on Web Site-->Add New Item -->Select Web Form--> click Add-->Now drag and drop Label and Button control from Toolbox on the Web Form as Given below:

Step :2 Now Double Click on Click Button and Write the following codes which is shown below:
using System;
using System.Web;
using System.Web.UI;
using System.Web.UI.WebControls;

public partial class labelcontrol : System.Web.UI.Page
{
    protected void Page_Load(object sender, EventArgs e)
    {

    }
    protected void Button1_Click(object sender, EventArgs e)
    {
        Label2.Text = "You can easily display any information inside it";
    }
}
Step :3 Now Run The Program(Press F5) and Press the Click Button.
Output:

2.) TextBox Control:-
The TextBox control is used to input the Data(text).Any end user can easily enter the text in this control.
Properties of TextBox Control:-
There are some important properties of TextBox controls.
- Text:-It is used to sets the text in TextBox Control.
- TextMode:- It is used to sets the mode of the TextBox Control as Single Mode,Multiline or Password.
- Rows:-It is used to sets the number of rows display in a TextBox(Multiline).
- MaxLength:->It is used to sets the maximum number of character alloweded in a TextBox control.
- ReadOnly:-It is used to read the contents by the end used but can not change it.
- Columns:-It is used to sets the width of character in TextBox.
- AutoCompleteType:-It is used to sets a value that indicates the Auto Complete behavior of the TextBox control.
- AutoPostBack:-It is used to handle the event when the TextBox control lose focus.
- CauseValidation:-It is used to set a value that validate the TextBox control(client,server).
- TextChange:-It is an event.It occurs when the end user change the text of the TextBox control.
Properties of Button Control:-
There are some important properties of Button controls.
- Text:- It is used to sets the text to be displayed on the Button Control.
- Click:-It is an Event that occurs when the Button is clicked.
- Command:- It is also an Event that occurs when the Button is clicked.It is used whenever we are using multiple Button on one page.
- CommandName:-It is used to sets the command Name associated with the Button control that is passed to the command event.
- OnClientClick:-It is used to sets the client side script that executes when a Button click event is fired.
- CauseValidation:- It is used to sets the validation that is perform or not when we click the Button control.
Step :1 First Open Your Visual Studio-->File-->New-->Web Site-->Select ASP.NET Empty Web Site-->OK-->Open Solution Explorer-->Right Click on Web Site-->Add New Item -->Select Web Form--> click Add-->Now drag and drop TextBox,Label and Button control from Toolbox on the Web Form as Given below:

using System;
using System.Web;
using System.Web.UI;
using System.Web.UI.WebControls;

public partial class _Default : System.Web.UI.Page
{
    protected void Page_Load(object sender, EventArgs e)
    {

    }
    protected void Button1_Click(object sender, EventArgs e)
    {
        String str = TextBox1.Text;
        Label2.Text = str;
    }
}
Step :3 Now Run The program(press F5) and click the Button.
output:

4.) Literal control:-
It is similar to Label control but there are some differences and similarities which is given below.- Literal and Label control both are used to display the text(information) on the web form.
- On Browser side Label control is converted to HTML 'Span' tag but Literal control is not converted in any HTML tag.
- We can provide formatting to the Label control but not to the Literal control.
- If we want to show some HTML code and java script code the we used mainly Literal control ,not Label control.Encoding Mode is used with Literal control only.
Properties of Literal Control:-
There are some important properties of Literal controls.- Mode:- IT IS A Literal control property called Mode which can be changed as Transform,Encode and Pass Through.
- Text:-It is used to sets the caption displayed in the Literal.
Step :1 First Open Your Visual Studio-->File-->New-->Web Site-->Select ASP.NET Empty Web Site-->OK-->Open Solution Explorer-->Right Click on Web Site-->Add New Item -->Select Web Form--> click Add-->Now drag and drop Literal,Label and Button control from Toolbox on the Web Form as Given below:

Step :2 Now Double click on Click button and write the following codes which is given below:
using System;
using System.Web;
using System.Web.UI;
using System.Web.UI.WebControls;

public partial class Literal_and_label_controls_ : System.Web.UI.Page
{
    protected void Page_Load(object sender, EventArgs e)
    {

    }
    protected void Button1_Click(object sender, EventArgs e)
    {
        Literal1.Text = "Hello Asp.net Website I am Literal Control";
        Label2.Text = "Hello Asp.net Website I am Label Control";
    }
}
Step :3 Now Run the program(press F5) and press the click button.
output:-

Now you see browser source code,you will see Label control converted to HTML span tag
see it:

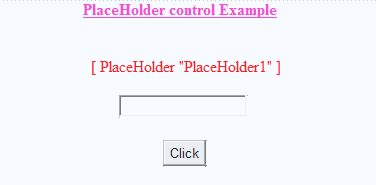
5.) PlaceHolder control:-
It is known as container control in Asp.Net.It is mainly used to store the value of other controls.You can Add controls to a Web Form by using the Controls.Add() Method.
There are some steps to implement the PlaceHolder control on the Web Form which is given below:
Step :1 First Open Your Visual Studio-->File-->New-->Web Site-->Select ASP.NET Empty Web Site-->OK-->Open Solution Explorer-->Right Click on Web Site-->Add New Item -->Select Web Form--> click Add-->Now drag and drop PlaceHolder and Button control from Toolbox on the Web Form as Given below:
Step :2 Now Double click on Click button and write the following codes which is given below:
using System;
using System.Web;
using System.Web.UI;
using System.Web.UI.WebControls;
public partial class placeHoldercontrol : System.Web.UI.Page
{
    protected void Page_Load(object sender, EventArgs e)
    {

    }
    protected void Button1_Click(object sender, EventArgs e)
    {
        PlaceHolder1.Controls.Add(TextBox1);
    }
}
Step :3 Now Run The Program(Press F5) and Press the Click Button.
Output:

6. )HiddenField control:-
It is used to display the value stored in the HiddenField control in the Label control.It stores the information in the form of Strings.
There are some steps to implement the HiddenField control on the Web Form which is given below:
Step :1 First Open Your Visual Studio-->File-->New-->Web Site-->Select ASP.NET Empty Web Site-->OK-->Open Solution Explorer-->Right Click on Web Site-->Add New Item -->Select Web Form--> click Add-->Now drag and drop HiddenField,TextBox,Label and Button control from Toolbox on the Web Form as Given below:

Step :2 Now Double click on Click button and write the following codes which is given below:
using System;
using System.Web;
using System.Web.UI;
using System.Web.UI.WebControls;

public partial class HiddenFieldcontrol : System.Web.UI.Page
{
    protected void Page_Load(object sender, EventArgs e)
    {

    }
    protected void Button1_Click(object sender, EventArgs e)
    {
        HiddenField1.Value = TextBox1.Text;
        Label2.Text = HiddenField1.Value;
    }
}
Step :3 Now Run The Program(Press F5) and Press the Click Button.
Output:

7. )FileUpload Control:-
It is basically used to Upload the File on the server using SaveAs() method on the click Event.When user browse a File and after browse click the Upload button then File is automatically Upload on the Server.
There are some steps to implement the FileUpload control on the Web Form which is given below:
Step :1 First Open Your Visual Studio-->File-->New-->Web Site-->Select ASP.NET Empty Web Site-->OK-->Open Solution Explorer-->Right Click on Web Site-->Add New Item -->Select Web Form--> click Add-->Now drag and drop FileUpload,Label and Button control from Toolbox on the Web Form as Given below:

Step :2 Now Double click on Click button and write the following codes which is given below:
using System;
using System.Web;
using System.Web.UI;
using System.Web.UI.WebControls;

public partial class Fileuploadcontrol : System.Web.UI.Page
{
    protected void Page_Load(object sender, EventArgs e)
    {

    }
    protected void Button1_Click(object sender, EventArgs e)
    {
        FileUpload1.SaveAs("I:/" + FileUpload1.FileName);
        Label2.Text = "File"+" " + FileUpload1.FileName +" "+"is uploaded successfully";
    }
}
Step :3 Now Run The Program(Press F5) ,Browse File from your computer and Press the Click Button.
Output:

8. ) Image control:-
It is used to display an image on a web page.Properties of Image control:-
There are some important properties of Image control controls.
- Alternate Text:- It is used to display alternate text when the image is not present.
- ImageAlign:-It is used to sets the alignment of image control on the web page.
- ImageUrl:-It is used to sets the path to an image to display in the image control.
- Font:-It is used to increase or decrease font of the image control text.
- DescriptionUrl:-It is used to set the location to a detailed description for the image.
There are some steps to implement the Image control on the Web Form which is given below:
Step :1 First Open Your Visual Studio-->File-->New-->Web Site-->Select ASP.NET Empty Web Site-->OK-->Open Solution Explorer-->Right Click on Web Site-->Add New Item -->Select Web Form--> click Add-->Now drag and drop Image control from Toolbox on the Web Form as Given below:
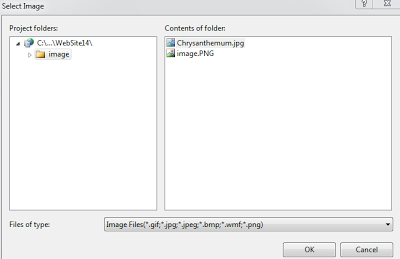
Step :2 Now copy the Image from computer and paste in the Website folder as shown below:

Step :3 Now Go Image Property-->click on ImageUrl Property-->select your image.

You will see following output:

9. ) ImageButton control:-
It is used to display the image on Button instead of text.Properties of ImageButton is same as Button property.10. ) ImageMap control:-
It is used to provide various links(hotspots) to navigate to other web page,depending on the place where the user clicks.Properties of ImageMap Control:-
There are some important properties of ImageMap control.
- Hotspots:-It obtains a group of Hotspot Object that is defined in a ImageMap.
- Target:-It is used to sets target window to show the web page when the ImageMap control clicked.
- Enabled:- It is used to sets a value indicating whether the control can respond to the user interaction.
There are some steps to implement the Image control on the Web Form which is given below:
Step :1 First Open Your Visual Studio-->File-->New-->Web Site-->Select ASP.NET Empty Web Site-->OK-->Open Solution Explorer-->Right Click on Web Site-->Add New Item -->Select Web Form--> click Add-->Now drag and drop ImageMap,ImageButton and Label control from Toolbox on the Web Form as Given below:
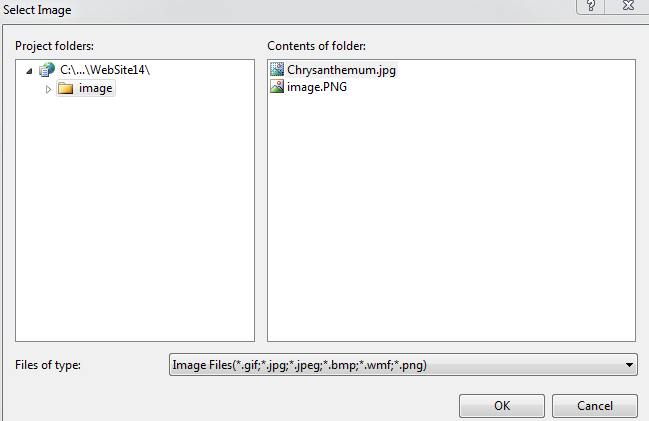
 Step :2 Now copy the Image from computer and paste in the Website folder as shown below:
Step :3 Now Go properties of ImageMap and ImageButton and Select appropriate image by Clicking ImageUrl.

Step :5 Now Run the Program(Press F5) and Click the Image Button.Step :3 Now Go properties of ImageMap and ImageButton and Select appropriate image by Clicking ImageUrl.
Step :4 Now go Properties of ImageMap control and select( Collection).Add new hotspots as shown below:

output:

Note:- I have implemented this Application with some controls,Download it and Implement on Your System One by one.
First open This application in Your Visual studio(copy whole Web Form and paste your website folder)-->Go Solution Explorer-->Right click on Web form Which you want to Run-->click Set As a Start Page.Then you can Easily Run Each Web page.
For More:-
- Web Forms Controls in ASP.NET part2
- Reflection in C#
- File Handling in C#
- Interview Questions in C#
- Ado.Net Application
- Add captcha image in Asp.net Application
download whole Attached File
Download
0 comments:
Post a Comment