How to use HoverMenuExtender control on ASP.NET Website

By // No comments:
Hi Friend, Today we will learn "How to use HoverMenuExtender control on ASP.NET Website". This will work when you move mouse pointer over the target control.I will explain it with an example. It display a pop-up menu when you move mouse pointer over the target control. In HoverMenuExtender control , you can also specify the position the pop-up panel in the web page. This control is similar to PopupControlExtender control because both controls display a pop-up  window to show the additional content. It is very useful to display a context menu or you want to provide tips automatically when an ASP.NET control receives focus. If you are not install Ajax Control Kit on your visual studio, You can Install it From here 
There are some important properties of HoverMenuExtender control as given below:-
1.) TargetControl ID :- It sets the ID of the control to which the extender control is attached.
2.) PopupControl ID :- It sets the ID of the pop-up control that is displayed when the mouse hover over the target control.
3.) PopupPosition :- It sets the position of the pop-up relative to the target control.
4.) HoverCssClass :- It sets the css class that is to be applied to the target control when the hover menu pop-up is displayed.
5.) Animation :-  It sets the animations to be applied to the HoverMenuExtender control.
6.) Offset X/Offset Y:- It sets the number of pixels  to the offset the pop-up from it default position.
7.) PopDelay :- It sets the time for the pop- up to remain visible when mouse moves away from the target control.
3

How to Use ColorPickerExtender Control on ASP.NET Web Page

By // No comments:
Hi Friend , Today we will learn "How to Use ColorPickerExtender Control on ASP.NET Web page ".  This control is used to provide client-side color picking functionality with UI in a Pop-up.You can select the color from the color piker by pressing the color Picker palette. You can enter custom color  value in the Text Box Control which is not present in the color picker palette.  If you have not install Ajax Toolkit on your visual studio then first install it from Here .  
There are some Properties of the ColorPickerExtender control as given below:-
  • TargetControlID :- It sets the ID of the text box to extend with ColorPickerExtender control.
  • SampleControlID :- It sets the ID of the control to show the color picker's selected color.
  • PopupButtonID :- It Sets the ID of the control to show the color picker pop-up when clicked.
  • SelectedColor:- It indicates the color value with which the ColorPickerExtender Control is Initialized.
  • PopupPosition :- It indicates the position where the ColorPickerExtender  control's popup should appear.
  • OnClientColorSelectionChanged:- It invokes the JavaScript function when the colorSelectionChanged event is raised.
3

How to Use HTMLEditor Control on ASP.NET Website

By // No comments:
Hi Friend, Today we will learn about HTMLEditor control in AjaxControlKit. The HTMLEditor control allows you to easily create and edit HTML content.This control contains various toolbars that are used for text editing. There are many options presents in this toolbar. You can change the style of the text using options present in the toolbars. Before Using this control, you have to install AjaxToolkit on your visual studio. You can download and install it from Here
The HTMLEditor control has various style pages such as
  • Custom skin with modified bottom toolbar
  • Lite top toolbar
  • Lite top toolbar without bottom toolbar
  • HTMLEditor without bottom toolbar.
  • HTMLEditor controls inside the tab cntrol
  • Full screen expanded
  • Custom buttons added to the top toolbar
  • etc
There are some important properties of HTMLEditor control as given below:-
3

How to Use SlideShowExtender Control on ASP.NET Website

By // No comments:
Hi Friend,Today we will learn "How to use SlideShowExtender control on asp.net website". The SlideShowExtender enables you to create a slideshow of images. This is helpful to allow you to add buttons to perform some actions ,such as Previous ,play and Next. You can show your slides automatically or manually on the page .The images included in the slideshow are added to the extender control using a web service or a page method.
In this control , you can show your images automatically or with the help of button's clicks on the page. For this control you have to required AjaxControlKit . So you can download and install it from Here.
There are some important properties of this control as given below:-
3

How to Use Slider Extender Control on ASP.NET Website

By // No comments:
Hi Friend, Today we will learn about Slider Extender Control in AjaxToolkit. You can take input from slider control and display the output to another control. It enables you to upgrade a classic Text Box control into a graphical slider.The client uses this slider to pick up a number value from a finite range.The default range of the slider is from 0 to 100. You can set the orientation of the slider either horizontal or vertical.If you have not install AjaxControlKit on your visual studio, first install it from Here.      
There are some properties of Slider Extender control as given below:-
3

How to Use ResizableControlExtender Control on Your Asp.Net Website

By // No comments:
Hi Friend, Today, we will learn about ResizableControlExtender control in Ajax Toolkit. So before learning this control, you have to install Ajax Toolkit on your visual studio.You install it from here .     The ResizableControlExtender control provides a graphical handle that enables the users to dynamically resize the control. You can put resizing limit (maximum and minimum property) of your control when it is rendered for the first time. You can see ,the handle is placed at the bottom right corner of the control.When a user resizes the control,the content within the control automatically resizes to fit to the new dimension.
There are some properties of ResizableControlExtender control as given below:-
3

How to use the NumericUpDownExtender Control in asp.net website

By // No comments:
Hi Friend, Today,we learn"How to implement the NumericUpDownExtender control in asp.net website ". The NumericUpDownExtender control enables you to add an up and down button next to the Text Box control.
These buttons are used to increment or decrement through a set of numeric values or other items such as days of week, months of the year etc. You can also use custom images in place of the up and down buttons to navigate through the specified numeric values.Here the up and down buttons are added to increase and decrease the values of the text box. The default increment and decrement are +1 and -1 respectively. If you have not installed AjaxToolkit in your visual studio, first install it from here .
There are some properties of the NumericUpDownExtender control as given below:-
3

How to Implement AlwaysVisibleControlExtender control on your asp.net web page

By // No comments:
Hi friend,Today we will learn "How to use AlwaysVisibleControlExtender control on your asp.net web page".Before using this control,First you have to install AjaxToolKit on your visual studio. In our previous tutorial,i have already explained it in detail.Here you can download ajaxtoolkit and install it on your visual studio.I have mentioned complete steps here. You can follow it and install it. 
you can also implemet CalenderExtender control  on the text Box or other place from above link.
AlwaysVisibleControlExtender control:-
This allow you to fix an asp.net control or a set of controls to on the page corners.This creates a floating appearance of the static controls on the web page,when you scroll or resize the window.The main functionality of this Extender control is to make a server control always visible.
There are some properties of AlwaysVisibleControlExtender control as given below:-
1.) TargetControlID :- It sets the id of the control which
you want to make visible.
2.) VerticalOffset :-It sets the  distance of the target control to the vertical side edge of the browser.The default distance is Zero Pixel.
3.) VerticalSide :-It sets the target control using the vertical edge of the browser (top,middle,or bottom).The default value of the property is top.
4.) HorizontalOffset :-It sets the distance of the target control to the HorizontalSide edge of the browser .The Default distance is zero pixels.
5.) HorizontalSide :- It sets the target control using the horizontal edge of the browser (left,middle,or right).The default value of the property is left.
6.) ScrollEffectDuration :-It sets the time to last the scrolling effect while repositioning the target control.Te default value is 0.1 second.
3

How to Install Ajax Toolkit in Visual Studio and Link the Calendar Extender control to TextBox in Asp.Net

By // 1 comment:
Hi Friends ! Today, I am going to show you "How to install ajax Toolkit in visual studio 2010 as well as link the Calendar Extender Control to TextBox ".You have already seen this concepts in many websites. If you add Normal Calendar control on web page,it occupy more space on web page.I have explained about Normal Calendar control in our previous post.see here.You can easily pick the date through this control on the web page by mouse click on TextBox.You can pick the date manually also on the web page through DropDownList control.But Calendar Extender control is using mostly at this time. It is very simple process to pick a date. Before using this concept,you have to install Ajax Toolkit in Visual studio's Toolbox.There are some steps to implement this concepts on the web page which are given below:-
3

Ajax In ASP.NET

By // No comments:
Ajax is neither a new programming language nor a new platform for developing websites. Ajax is a new technology which is used to displays the refreshed content on a web page by using the page update approach rather than page replacement approach.
Ajax is built using various technologies which are us follows:-
  • Java Script:-
Java Script is a client side dynamic scripting language that supports object-oriented programming.It provides various tools, such as from elements, to communicate with server.
  • X HTML:-
X HTML is a combination of HTML and XML.X HTML is used with Ajax enabled website to ensure that the website runs consistently on all Browsers(IE, Firefox,Chrome, Opera mini).
  • CSS (Cascading style sheet):-
CSS is a file that define the pattern of a web form.Using CSS, you can specify fonts,colours, styles(bold,italic) and size of controls.It is used to design attractive web page.
  • DOM (Document Object Model):-
DOM represents a structured web form in an object oriented model. It is a platform and language -independent  interface that allows programs and scripts to access and update the content of web form.DOM is recommended by world wide web consortium(w3c) to manipulate content at run time.
  • XMLHttpRequest Object:-
The core of Ajax functionality is the XMLHttRequest object, as it is responsible for making asynchronous requests to a server,updating the server response and performing necessary changes in the current web page. It sends and receives data in the form of XML.

Ajax Server or Extension Controls:-
  • Script Manager:-
Script Manager Controls helps in implementing the Ajax functionality in an asp.net website. You need to add this control on a web page whenever Ajax functionality is required. It manage all the Ajax control on the web page. If we are using  Ajax control over web page then we first drag and drop this control on the web page.
  • ScriptManagerProxy Control:-
In any Ajax enabled website is only one Script Manager Control,which manage all the Ajax server controls on that page. If the website contains a 'Master Page'and the Script Manager Control is added in the Master Page. Then  all the web page inherited from the Master Page.For this purpose each content page requires a link to connect to Master Page's Script Manager Control.The content page uses the the Script Manager proxy control to make a link with master page.
EX:-  If  the service and scripts added earlier in the Script Manager Control of the Master Page are not useful for your current web page, then you can remove them by using the Script Manager Proxy Control.
  • UpdatePanel Control:-
The UpdatePnael Control helps to divide your web page into parts, where each part can be update independently. If we have a button on the web page, which clicking the page goes to the server and back to the client ,if we want to go only a small part of web page to the server then we use the UpdatePanel Control.  

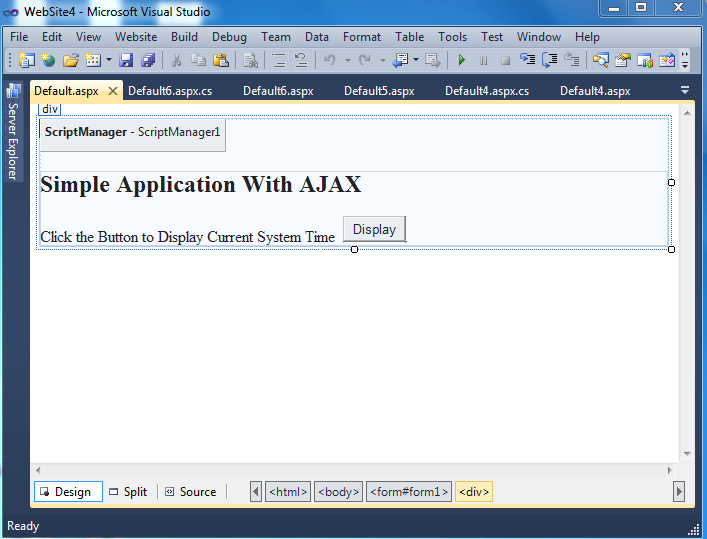
Creating a simple Application:-
  • Drag and drop  ScriptManager control,UpdatPanel control , a button control and two label controls from the Toolbox on the Design view of the Default.aspx page.


  • Set the Text property of the Label1 control s to simple Application with AJAX ,the Button1 control to Display and ID property to Btndisplay.
->On Btndisplay Double click:-

protected void Btndisplay_Click(object sender, EventArgs e)
    {
        String myDateTime;
        myDateTime = System.DateTime.Today.ToLongDateString() + " ";
        myDateTime += System.DateTime.Now.ToLongTimeString();
        TimeLabel.Text = myDateTime;
    }


OUTPUT:-


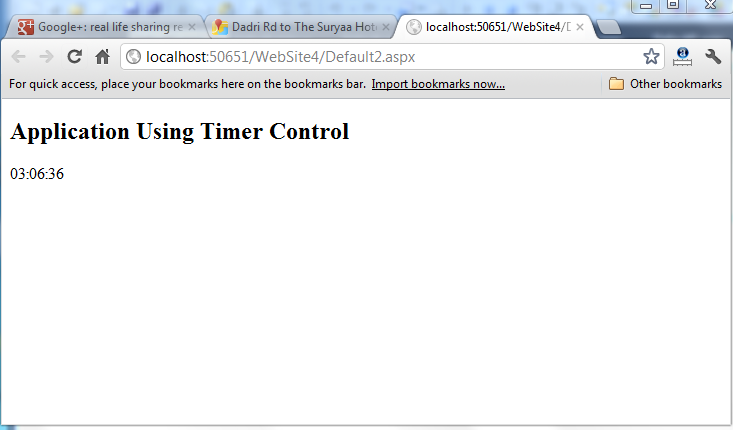
Application Using Timer Control:-

The Timer control can be used in the following two ways:-
  • Inside the Update Panel Control
  • Outside the  Update Panel Control
Here we are showing  Timer control Inside the Update Panel Control.Outside the  Update Panel Control is similar to this .You Can download whole Application from the below  download link.


  • Drag and drop a Script Manager control, Update Panel  control,Timer control and two Label controls from the Toolbox on the Design view of the Default2.aspx page.To use Timer control inside the Update Panel control.

  • Set the  Text property of the Label1 control to Application using Timer control,Label2 control to current System time,D property of the Label1 control to Label Heading, ID property of the Label2 control to Time Label,ID property of the Timer control to Timer Updater, and Interval property to 1000

Double click on Timer -Time Updater control:

protected void TimeUpdater_Tick(object sender, EventArgs e)
    {
        TimeLabel.Text = System.DateTime.Now.ToLongTimeString();
    }

OUTPUT:-
Your system current time will be displayed.


Application Using Update Progress Control:-`
  • Using the Update Progress control for single Update Panel Control.
  • Using the Update Progress control for Multiple Update Panel Control.
Here we are going to show Update Progress control for Multiple Update Panel Control. Here we are using two  Update Panel Control.

Design view Defaut4.aspx:-


Code of Defaut4.aspx.cs:-

protected void BtnProgress_Click(object sender, EventArgs e)
    {
        System.Threading.Thread.Sleep(5000);
 //LabelDemo.Text = "Demonstration on Update Progress Control taken place last time at " + System.DateTime.Now.ToLongTimeString();
        Response.Redirect("default5.aspx");
    }


OUTPUT:-
In this ,you will see that update is in progress and after 5000 interval it go to Default5.aspx.


For More:-
  1. Setup File
  2. Make Registration Page with ajax
  3. E-Post System Project
  4. Host Asp.Net Application on IIS Server
  5. Interview questions and Answers

Click below for download whole AJAX application .
         DOWNLOAD
3
Powered by Blogger.