
Hi friend ,Today we will learn about the XmlDataSource Control in asp.net. The XmlDataSource Control allows a data bound control to bind the data from a XML document.This control also supports Xpath expressions that allow you to return only certain nodes from the XML document.In our previous post ,i have already explained some database controls with examples.
There some steps to implement this whole concepts as given below:-
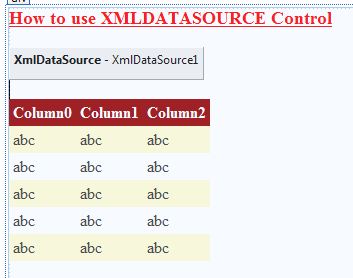
Step 1:- First open Your visual studio-->Create an Asp.net Empty website-->Add a Default.aspx page -->drag and drop XmlDataSource and Gridview controls on the page as shown below:-

Step 2:- Now open Solution Explorer window--> Add an XML File inside App_Data Folder as shown below:-

Step 3:- Now Add some values (data) inside the xml file as shown below:-
 Step 4:- Now open XmlDataSource tasks--> Configure Data Source.. as shown below:-

Step 5:-Now Press Browse Button as shown below:-

Step 6:- Now select XML File --> OK as shown below:-


Step 7:- Now open Gridview Tasks --> Select XmlDataSource1 as shown below:-

Step 8:-Now Open Source file-->Write the codes for generating the columns and bound the data in Gridview control as given below:-
 For More...
Download
There some steps to implement this whole concepts as given below:-
Step 1:- First open Your visual studio-->Create an Asp.net Empty website-->Add a Default.aspx page -->drag and drop XmlDataSource and Gridview controls on the page as shown below:-
Step 2:- Now open Solution Explorer window--> Add an XML File inside App_Data Folder as shown below:-
Step 3:- Now Add some values (data) inside the xml file as shown below:-

Step 5:-Now Press Browse Button as shown below:-

Step 6:- Now select XML File --> OK as shown below:-


Step 7:- Now open Gridview Tasks --> Select XmlDataSource1 as shown below:-

Step 8:-Now Open Source file-->Write the codes for generating the columns and bound the data in Gridview control as given below:-
<%@ Page Language="C#" AutoEventWireup="true" CodeFile="Default.aspx.cs" Inherits="_Default" %>

<!DOCTYPE html PUBLIC "-//W3C//DTD XHTML 1.0 Transitional//EN" "http://www.w3.org/TR/xhtml1/DTD/xhtml1-transitional.dtd">

<html xmlns="http://www.w3.org/1999/xhtml">
<head runat="server">
    <title></title>
</head>
<body>
    <form id="form1" runat="server">
    <div>

        <span class="style1"><strong>How to use XMLDATASOURCE Control</strong></span><br />
        <br />
        <asp:XmlDataSource ID="XmlDataSource1" runat="server"
            DataFile="~/App_Data/XMLFile.xml"></asp:XmlDataSource>
        <br />
        <asp:GridView ID="GridView1" runat="server" AutoGenerateColumns="False"
            CellPadding="4" DataSourceID="XmlDataSource1" ForeColor="#333333"
            GridLines="None">
            <AlternatingRowStyle BackColor="White" />
            <Columns>
                <asp:BoundField DataField="Name" HeaderText="Name" SortExpression="Name" />
                <asp:BoundField DataField="Mobile_Number" HeaderText="Mobile_Number"
                    SortExpression="Mobile_Number" />
                <asp:BoundField DataField="Graduation" HeaderText="Graduation"
                    SortExpression="Graduation" />
            </Columns>
            <FooterStyle BackColor="#990000" Font-Bold="True" ForeColor="White" />
            <HeaderStyle BackColor="#990000" Font-Bold="True" ForeColor="White" />
            <PagerStyle BackColor="#FFCC66" ForeColor="#333333" HorizontalAlign="Center" />
            <RowStyle BackColor="#FFFBD6" ForeColor="#333333" />
            <SelectedRowStyle BackColor="#FFCC66" Font-Bold="True" ForeColor="Navy" />
            <SortedAscendingCellStyle BackColor="#FDF5AC" />
            <SortedAscendingHeaderStyle BackColor="#4D0000" />
            <SortedDescendingCellStyle BackColor="#FCF6C0" />
            <SortedDescendingHeaderStyle BackColor="#820000" />
        </asp:GridView>
    </div>
    </form>
</body>
</html>

- Learn .NET Interview Questions and Answers
- Learn WPF Concepts with examples
- Learn WCF Concepts with Examples
- Learn web services with Examples
- Learn Crystal Repors with Examples
- Learn XML with examples
Download
0 comments:
Post a Comment